Finally the day has come for a pottery wheel which we will make with our own hands. And we will make it from an agitator washing machine. The name of it is “Washing machine”; it does not have any name or brand. It only says that it was made in China for a supermarket “Okay”. As a matter of fact I have bought it in that supermarket for 1200 rubles.
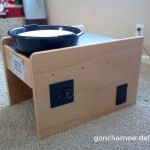
This is how it looks:


The key advantage of this washing machine for us: its spinning disk is positioned horizontally. And it is almost off-the-shelf pottery wheel! You just need to cut off the upper part of the container and substitute a riff led plastic disk with something more suitable… But first things first.
First you need to take down the washing machine and see what’s inside of it. And inside there is a motor, a condenser, a contact wheel (a big white disk), a belt, wires. There a timer on top, and we don’t need it. So we get rid of it but preliminarily we disconnect wires.

Now with great care we remove the belt off the contact wheel, unscrew the bolt that holds the wheel, and then remove the wheel. Then unscrew a big plastic nut and remove a riff led plastic disk.

Measure the sizes of a metal axis to which the plate is mounted; and then in accordance with it make a draft in which we will depict the parts we need. One part can be all-metal, for example aluminum; and the upper disk can be made from moisture proof plywood or textolite; and a holder disk can be made from steel.

Let’s go to a turner we know and let him turn the parts. It is very important to process these parts as a unit to maintain alignment.

A plywood disk needs to be covered with any water-resistant lacquer, for example marine-grade varnish. If possible impregnate the disk preliminarily: you can make the impregnation mixture yourself by mixing marine-grade varnish with white spirit.

Apply a prime coating on the metal holder and paint it.

If you got the sizes wrong, cut it and paint it again)

Let’s assemble.


Using a plastic jar make

such a part:

It will not allow water to penetrate inside the system.
Now let’s turn to the body of our pottery wheel. First mark a perforated line with a marker; it should be approximately 1 cm higher than the disk face.

You can make a back-end higher.

Cut it with a handsaw.

Glue pieces of plastic over the two holes to make two “cups”; there you can put tools later.


Now you need to deal with wires: what connects to what. On the motor there is a connection circuit from which you can see that a yellow wire connects the motor with the condenser, and a red wire is connected to one of those that is connected with the socket connection; and both of them are connected to another exit of the condenser.

A white wire through a surge-voltage protector is connected to the second wire of the socket connection. Now you need to connect our system to the mains and see in which direction a contact wheel is spinning. We want it to spin clockwise. So when we turn the assembled disk it should spin against the clock, unless you are a left-handed person. And to make the disk spin in another direction you just need to interchange the wire ends which are connected to the condenser.

Gather all the wire ends into a plastic bag and tie it.

And for more impact you can connect a switch as well:

Experience has shown that it should be bigger than the one in the picture, and should be protected from ingress of moisture.
Cut out the switch hole.

Connect wires.

Lay them down and fix them with the harness tape.

Technically we could finish here, but we lack one important part – a speed control unit. Unfortunately inductions motors (and this is what we have) come under speed control reluctantly, but still you can change speed to a small degree. To achieve it you need to attach such a thing to our pottery wheel:

It is a 500W power regulator. You can find it in Мастер-Ките. Connect it in the same manner as you connected the switch (you can use it as an alternative to the switch). You will only need to buy a turning handle for it.
After we assemble all the parts that’s what we will have))

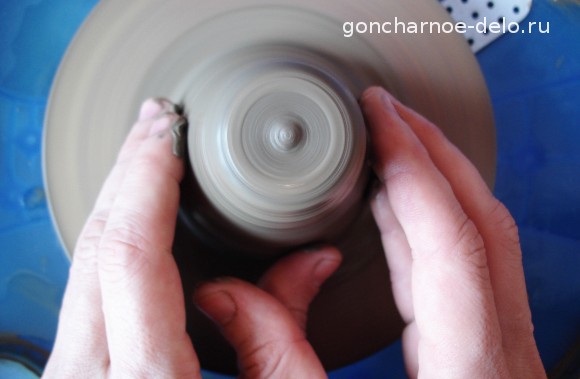
Using this device you can create your first works. But they will be not very big… But as soon as we learn we will make money to buy a professional pottery wheel (iMold Professional, к примеру) or we will make it with our own hands))
Test of the pen – our first pot.

See you soon again!
P.S. In comments below you can ask the author of this device different questions, and on our forum we can develop the theme about how to make pottery wheels with our own hands and share your experience.
Tags: Pottery wheel Categories: Lessons